Moving into a new home is exciting, but the days before you actually bring in your furniture are some of the most important in the entire moving process. Once boxes, beds, appliances, and personal belongings fill the rooms, many jobs that would have been easy become inconvenient, expensive, or nearly impossible to complete.
That is why having a detailed new home checklist can make such a difference.
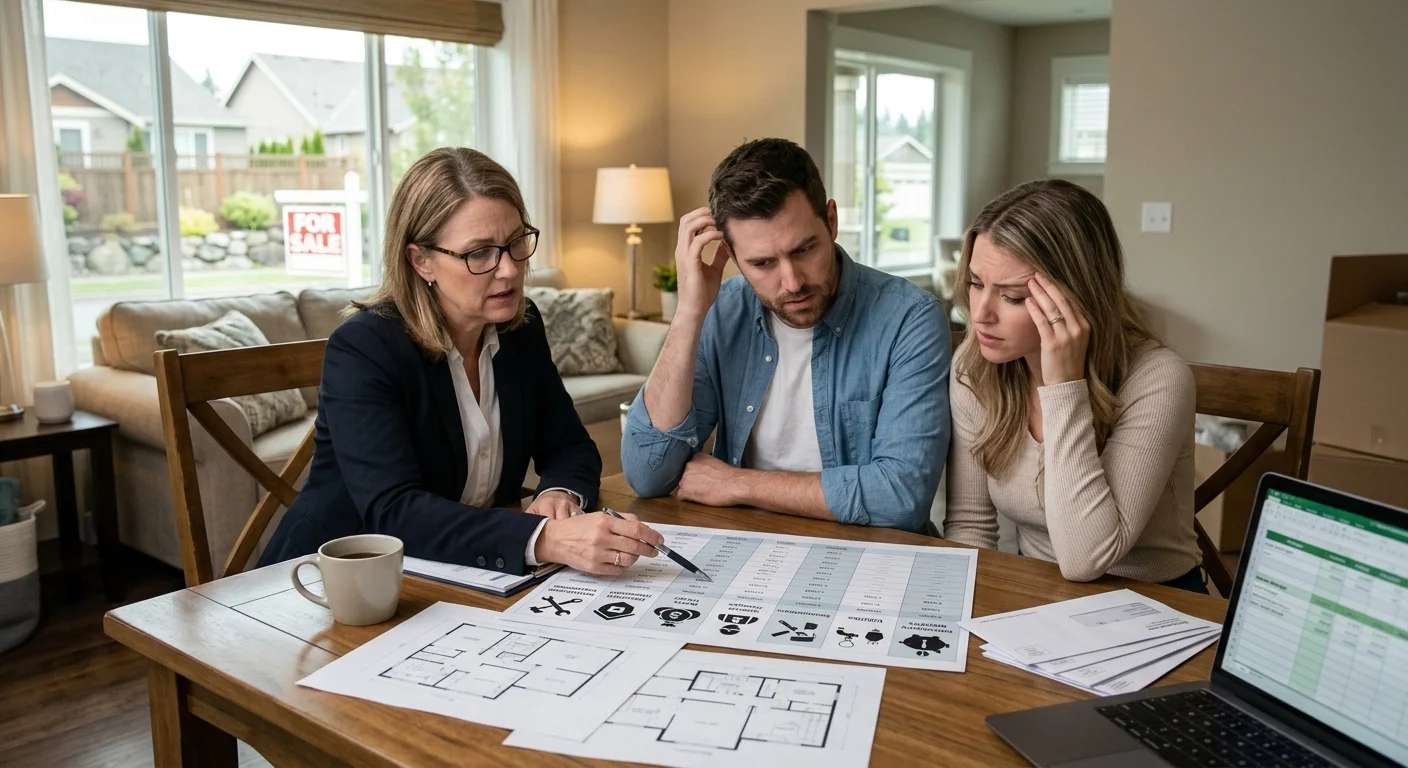
A new house should not be treated as an empty space where you simply unload your belongings. It is an opportunity to inspect the property, clean areas that will soon be hidden, complete maintenance tasks, arrange utilities, install internet, improve security, review insurance, and plan your furniture before daily life begins.
Whether you are buying your first home, moving into a larger house, relocating for work, or renting a new property, preparing properly can prevent many common problems.
The best approach is to divide your preparation into stages.
First, confirm that the property is ready and document its condition.
Next, arrange utilities and essential services.
Then clean the home thoroughly while every room is still empty.
After that, handle maintenance, safety, security, internet installation, and other technical work.
Finally, plan furniture placement and move in only after the most disruptive jobs have been completed.
This guide provides a practical home moving guide that you can use as a step-by-step checklist.
read more about preparing your home for a dog
Why You Need a New Home Checklist
Moving involves dozens of small tasks.
Some are obvious, such as packing boxes and arranging transportation.
Others are easy to forget:
Changing locks.
Testing smoke alarms.
Checking water pressure.
Cleaning behind appliances.
Measuring doorways.
Confirming internet availability.
Locating the electrical panel.
Finding the main water shutoff.
Reviewing insurance coverage.
Checking for leaks.
Planning where large furniture will go.
When these tasks are handled randomly, important details can easily be missed.
A structured checklist gives you a logical sequence.
It also helps you distinguish between tasks that must be completed before moving in and tasks that can wait.
For example, cleaning the floor underneath a refrigerator is much easier before the refrigerator arrives.
Painting a room is much easier before beds and wardrobes occupy the space.
Installing a wall-mounted television is easier before furniture is positioned.
Replacing a damaged electrical outlet is safer before the room is occupied.
The empty-home period is therefore extremely valuable.
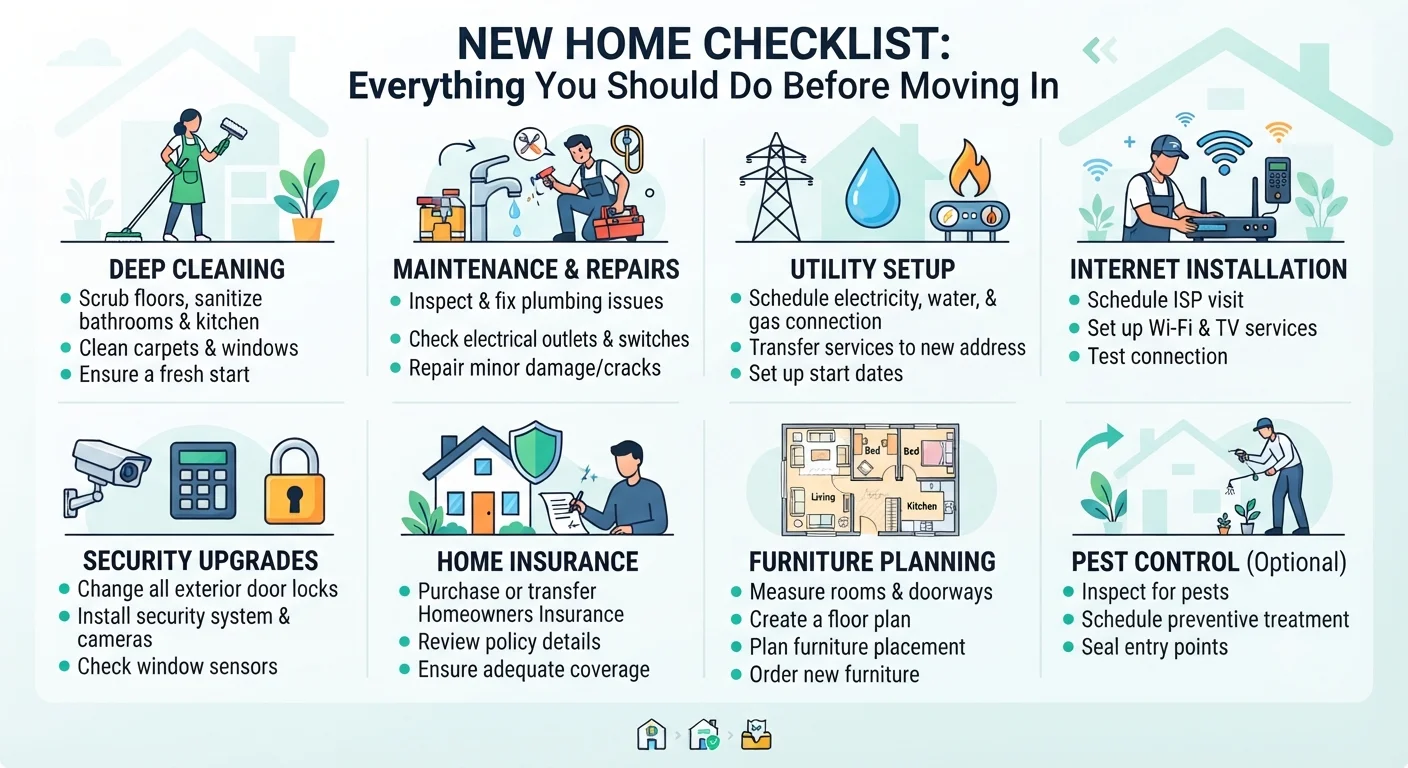
The Ultimate New Home Checklist at a Glance
Before moving into a new home, review these major categories:
- Confirm ownership or rental documentation.
- Document the property’s condition.
- Collect keys, access codes, and remotes.
- Locate utility shutoffs.
- Set up electricity.
- Arrange water service.
- Confirm gas service if applicable.
- Arrange waste collection.
- Schedule internet installation.
- Deep-clean the property.
- Inspect plumbing.
- Check electrical systems.
- Test heating and cooling.
- Inspect doors and windows.
- Check the roof and visible exterior areas.
- Test smoke and carbon monoxide alarms.
- Upgrade locks and security where necessary.
- Review home insurance.
- Measure rooms and doorways.
- Plan furniture placement.
- Schedule deliveries.
- Prepare essential items for the first night.
- Keep important documents accessible.
The rest of this article explains each step in detail.
Step 1: Confirm the Home Is Ready for Occupancy
Before bringing anything into the house, confirm that the property is actually ready.
If you purchased the property, review the final documents and make sure any agreed repairs or conditions have been completed.
If you are renting, inspect the property against the move-in condition report or lease documentation.
Look at:
Walls.
Ceilings.
Floors.
Doors.
Windows.
Fixtures.
Cabinets.
Appliances.
Bathrooms.
Kitchen surfaces.
Outdoor areas.
Do not assume that everything is perfect simply because the home looked good during a viewing.
A viewing is usually short.
A move-in inspection should be much more systematic.
Step 2: Photograph and Document the Property
One of the smartest things you can do when moving into a new home is photograph the property before unpacking.
Take clear photos and videos of every room.
Photograph:
Existing scratches.
Wall marks.
Cracks.
Damaged flooring.
Broken fixtures.
Water stains.
Appliance damage.
Cabinet defects.
Window problems.
Doors and locks.
Outdoor damage.
If you are renting, this documentation can be particularly important because it establishes the condition of the property when you moved in.
Take wide-angle photos showing the entire room as well as close-ups of specific damage.
Store the photos somewhere safe and preferably backed up.
Step 3: Collect All Keys and Access Devices
Make sure you know exactly what access devices belong to the home.
These may include:
Front-door keys.
Back-door keys.
Garage remotes.
Mailbox keys.
Building access cards.
Gate remotes.
Storage-room keys.
Alarm codes.
Smart-lock access.
Ask the previous owner, landlord, or property manager whether there are additional keys.
If you are unsure how many copies exist, consider replacing or rekeying the locks.
Step 4: Find the Main Utility Shutoffs
Before an emergency happens, learn where the important shutoffs are located.
You should know how to turn off:
Main water supply.
Gas supply, if applicable.
Main electrical supply.
Heating system.
Water heater.
Knowing these locations can help you respond quickly to leaks, electrical problems, or other emergencies.
Do not wait until water is pouring through the ceiling to search for the main water valve.
Step 5: Set Up Electricity
Electricity is one of the first services you need to arrange.
Depending on your location and property type, you may need to transfer an existing account or establish a new service.
Confirm:
Service start date.
Account information.
Meter reading.
Payment method.
Emergency contact details.
If electricity is already active, verify that all major circuits work.
Test representative outlets throughout the home.
Step 6: Check Every Electrical Outlet
A new home checklist should always include electrical inspection.
Walk through every room and test the outlets.
Look for:
Loose outlets.
Cracked covers.
Burn marks.
Discoloration.
Sparking.
Unusual warmth.
Missing covers.
Do not use an outlet that appears damaged.
If you notice electrical problems, have them evaluated by a qualified electrician.
Step 7: Locate the Electrical Panel
Find the main electrical panel.
Open it only if it is safe to do so.
Identify the labels for major circuits.
Ideally, circuits should be clearly labeled.
If labels are missing or incorrect, consider having the electrical system properly identified.
Knowing which breaker controls each room can save time during maintenance or emergencies.
Step 8: Arrange Water Service
Water is another essential utility.
Confirm whether water service is already active.
Check:
Kitchen faucets.
Bathroom faucets.
Shower.
Toilet.
Outdoor taps.
Laundry connections.
Look for unusual pressure changes.
Turn on faucets individually and check whether water flows properly.
Then inspect the area underneath sinks.
A slow leak can remain unnoticed until it damages cabinetry or flooring.
Step 9: Check Water Pressure
Water pressure affects everyday comfort.
Low pressure can make showers frustrating and reduce the effectiveness of fixtures.
Very high pressure can potentially place unnecessary stress on plumbing components.
Check multiple fixtures rather than judging pressure from a single faucet.
If pressure seems unusual, investigate the cause before moving in.
Possible causes can include:
Partially closed valves.
Clogged aerators.
Plumbing restrictions.
Pressure-regulating problems.
Building-level supply issues.
read more about first-time home buyer
Step 10: Inspect for Plumbing Leaks
Look underneath:
Kitchen sinks.
Bathroom sinks.
Laundry connections.
Water heaters.
Toilets.
Dishwashers.
Washing machines.
Look for:
Water droplets.
Dampness.
Stains.
Mold-like growth.
Corrosion.
Musty smells.
Do not ignore a small leak.
Minor plumbing problems can become expensive if they remain hidden behind cabinets or walls.
Step 11: Check the Toilets
Flush every toilet.
Check whether:
The toilet flushes correctly.
The tank refills properly.
Water continues running afterward.
The base remains dry.
The bowl drains normally.
If a toilet continues running after flushing, the problem may be relatively simple, but it should still be addressed.
Also inspect the seal around the base.
Step 12: Inspect Drains
Run water through every sink and shower.
Observe how quickly the water drains.
Slow drainage can indicate:
Hair buildup.
Debris.
A partial blockage.
Plumbing issues.
Do not immediately rely on aggressive chemical drain cleaners if a drain is seriously blocked.
Persistent problems may require professional inspection.
Step 13: Check the Water Heater
Locate the water heater and inspect the surrounding area.
Check for:
Leaks.
Corrosion.
Unusual noises.
Damaged connections.
Improper ventilation where relevant.
Find out:
Its age.
Its fuel type.
Its capacity.
Its maintenance history if available.
You should also know how to shut it down safely if an emergency occurs.
Step 14: Arrange Gas Service if Needed
If the home uses natural gas or another gas supply, confirm that service is properly connected.
Never attempt to repair gas lines yourself.
If you smell gas or suspect a leak, leave the area and contact the appropriate emergency service or qualified professional.
Gas systems require professional attention.
Step 15: Arrange Waste and Recycling Collection
It is easy to forget waste collection when planning a move.
Find out:
Collection days.
Recycling rules.
Container requirements.
Bulk-item procedures.
Yard-waste rules if applicable.
You will probably produce more waste than usual during the first week because of packaging and moving materials.
Knowing the schedule ahead of time prevents overflowing bins.
Step 16: Schedule Internet Installation Early
Internet service is now an essential part of many homes.
Do not wait until moving day to investigate availability.
Check which providers serve the property and what technologies are available.
Possible options may include:
Fiber.
Cable.
DSL.
Fixed wireless.
5G home internet.
Other local services.
If installation requires a technician, book the appointment before moving day when possible.
Step 17: Choose the Right Internet Location
Internet performance depends partly on where the router is positioned.
Avoid hiding the router:
Inside a cabinet.
Behind a television.
Inside a metal enclosure.
In a basement corner.
Behind large appliances.
A central, elevated location can often provide better wireless coverage.
If the home is large, you may need a mesh Wi-Fi system or additional access points.
Step 18: Plan Your Wi-Fi Before Moving In
Think about where you will use the internet most.
Important locations may include:
Home office.
Living room.
Bedrooms.
Kitchen.
Entertainment area.
Smart-home devices.
If you work from home, reliable connectivity should be treated as a priority rather than an afterthought.
Step 19: Deep Clean Before the Furniture Arrives
Cleaning is one of the most important parts of the new house preparation process.
An empty home is dramatically easier to clean.
Before bringing furniture inside, clean:
Floors.
Walls where appropriate.
Windows.
Cabinets.
Closets.
Baseboards.
Doors.
Light fixtures.
Bathrooms.
Kitchen appliances.
Storage areas.
Do not wait until after moving in.
Step 20: Clean the Kitchen Thoroughly
The kitchen deserves special attention because it comes into direct contact with food.
Clean:
Cabinet interiors.
Cabinet doors.
Countertops.
Sink.
Faucets.
Backsplash.
Range hood.
Oven.
Refrigerator.
Dishwasher.
Microwave.
Drawers.
Check for grease buildup, food residue, dust, and odors.
If appliances were left by previous occupants, clean them before storing your food and cookware.
Step 21: Clean the Refrigerator
If a refrigerator is already installed, remove shelves and drawers where possible.
Clean the interior surfaces.
Check:
Door seals.
Drain areas.
Shelves.
Drawers.
Ice maker.
Water dispenser.
Clean underneath and behind the refrigerator if accessible.
This is much easier before your groceries arrive.
Step 22: Clean the Oven
Grease buildup can accumulate over time.
Clean the interior according to the manufacturer’s instructions.
Do not use cleaning products that are incompatible with the oven’s surfaces or self-cleaning system.
Also clean:
Racks.
Door glass.
Control surfaces.
Vent area.
Step 23: Deep Clean Bathrooms
Bathrooms should receive a detailed cleaning before use.
Clean:
Toilets.
Sinks.
Showers.
Bathtubs.
Tiles.
Grout.
Mirrors.
Cabinets.
Flooring.
Ventilation covers.
Check for signs of mold or persistent moisture.
If a bathroom repeatedly develops moisture problems, investigate ventilation rather than simply cleaning the visible symptoms.
Step 24: Clean Closets and Storage Areas
Closets are frequently overlooked.
Before filling them with clothes, clean:
Shelves.
Floors.
Corners.
Doors.
Ceilings.
Closet rods.
Storage cabinets.
This is also the perfect time to evaluate whether additional shelving or storage systems are needed.
Step 25: Clean Windows and Window Tracks
Windows can collect significant amounts of dust.
Clean the glass, frames, and tracks where appropriate.
Check:
Locks.
Seals.
Screens.
Opening mechanisms.
Condensation.
Damaged glass.
If windows are difficult to open or close, address the problem before moving furniture in front of them.
Step 26: Clean Floors Before Moving Furniture
Clean floors according to their material.
Different surfaces require different care.
Examples include:
Hardwood.
Laminate.
Tile.
Vinyl.
Stone.
Carpet.
Do not assume that one cleaning product is suitable for every surface.
For carpets, determine whether professional cleaning is necessary before moving in.
Step 27: Check for Moisture and Mold
Look carefully at areas where moisture problems are more likely.
These include:
Bathrooms.
Under sinks.
Basements.
Laundry rooms.
Around windows.
Near exterior walls.
Behind appliances.
Look for:
Dark spots.
Peeling paint.
Musty smells.
Water stains.
Soft materials.
Persistent condensation.
Visible mold should not simply be painted over.
The source of moisture needs to be addressed.
Step 28: Inspect Ceilings and Walls
Walk through each room and inspect ceilings and walls.
Look for:
Cracks.
Water stains.
Peeling paint.
Bulging areas.
Uneven surfaces.
Signs of previous repairs.
A small cosmetic crack may be harmless, but larger or changing cracks may require professional evaluation.
Step 29: Check Doors and Windows
Open and close every major door and window.
Make sure:
They latch properly.
Locks work.
Handles are secure.
Frames are not obviously damaged.
Windows open safely.
Screens fit properly.
Good doors and windows contribute to security, comfort, energy efficiency, and weather protection.
read more about apartment vs house
Step 30: Inspect Weather Sealing
Check visible gaps around exterior doors and windows.
Poor sealing can allow:
Dust.
Rain.
Hot air.
Cold air.
Insects.
Noise.
Energy loss.
Weather stripping and caulking can sometimes address minor gaps, while larger issues may require professional work.
Step 31: Test Heating and Cooling Systems
Before moving in, test the home’s heating and cooling equipment.
If there is central air conditioning, verify that it starts correctly and produces appropriate airflow.
Check:
Thermostat.
Filters.
Indoor vents.
Outdoor unit.
Unusual sounds.
Unusual smells.
Weak airflow.
If maintenance has not been performed recently, schedule professional servicing.
Step 32: Replace HVAC Filters
A clean filter can help maintain airflow and indoor air quality.
Check the existing filter.
If its condition is poor, replace it with the correct size and type recommended for the system.
Write the replacement date somewhere convenient so you can establish a maintenance routine.
Step 33: Clean Air Vents
Dust can accumulate around vents and registers.
Vacuum accessible areas carefully.
If you notice significant contamination inside the ductwork, obtain professional advice rather than automatically paying for unnecessary duct cleaning.
Step 34: Test Smoke Alarms
Smoke alarms are essential safety devices.
Test every alarm.
Check batteries where applicable.
Confirm that alarms are installed in appropriate locations.
If the alarms are old or their condition is uncertain, consider replacing them.
Step 35: Check Carbon Monoxide Protection
If the home has fuel-burning appliances or an attached garage, carbon monoxide protection is particularly important.
Install appropriate carbon monoxide alarms according to local safety guidance.
Test existing alarms.
Do not ignore an alarm or attempt to silence a suspected carbon monoxide emergency without addressing the cause.
Step 36: Review Fire Safety
A complete new home checklist should include basic fire preparation.
Consider:
Fire extinguishers.
Smoke alarms.
Carbon monoxide alarms.
Emergency lighting.
Clear exits.
Accessible windows.
Family emergency plans.
Make sure everyone in the household knows the safest exits.
Step 37: Upgrade the Locks
One of the first security upgrades many homeowners consider is changing exterior locks.
If you do not know who has copies of the old keys, changing or rekeying the locks provides greater control over access.
Check:
Front door.
Back door.
Garage entry.
Side doors.
Storage areas.
Step 38: Consider Smart Locks Carefully
Smart locks can provide:
Temporary access codes.
Remote locking.
Activity notifications.
Keyless entry.
However, they also introduce digital security considerations.
Choose reputable products and use strong account credentials.
Keep physical backup access available where appropriate.
Step 39: Inspect Outdoor Security
Walk around the exterior of the property.
Check:
Gates.
Fences.
Exterior lights.
Garage doors.
Door locks.
Windows.
Hidden entry points.
Overgrown vegetation.
Good exterior visibility can discourage unauthorized access.
Step 40: Improve Exterior Lighting
Dark entrances and walkways can create unnecessary security risks.
Consider lighting:
Front door.
Back entrance.
Garage.
Side paths.
Driveway.
Motion-activated lighting can be useful in some locations.
Step 41: Consider Security Cameras
Security cameras can provide useful monitoring around entrances and other appropriate areas.
Before installing them, consider:
Field of view.
Lighting.
Internet connectivity.
Power supply.
Privacy.
Local laws.
Avoid positioning cameras in ways that improperly invade neighbors’ or other people’s privacy.
Step 42: Review Your Home Insurance
Insurance should be arranged before or immediately after moving in, depending on your situation and local requirements.
Review coverage for:
Building structure.
Personal belongings.
Liability.
Water damage.
Fire.
Theft.
Temporary accommodation where applicable.
Do not assume that the policy automatically covers every type of damage.
Read the exclusions.
Step 43: Create a Home Inventory
Before unpacking everything, consider documenting valuable belongings.
Photograph:
Electronics.
Furniture.
Jewelry.
Appliances.
Collectibles.
Other expensive items.
Record serial numbers where appropriate.
Store the information securely.
This can make insurance claims easier if a serious loss occurs.
Step 44: Check Your Furniture Measurements
One of the most frustrating moving experiences is discovering that a sofa cannot fit through the front door.
Measure:
Front door.
Interior doors.
Hallways.
Staircases.
Elevators.
Narrow corners.
Ceiling height where relevant.
Compare those measurements with your furniture.
Step 45: Plan Furniture Placement Before Moving Day
Create a simple floor plan.
Mark where you expect to place:
Sofa.
Beds.
Dining table.
Wardrobes.
Desk.
Television.
Bookshelves.
Large appliances.
Storage units.
Planning ahead helps movers place heavy furniture correctly the first time.
Step 46: Think About Traffic Flow
Furniture should not simply fit into a room.
It should allow people to move comfortably.
Avoid blocking:
Doors.
Windows.
Heating vents.
Electrical panels.
Walkways.
Emergency exits.
Think about how people will move through the room during normal daily activities.
Step 47: Plan Electrical Access
Consider where devices will need power.
Examples include:
Television.
Computer.
Desk lamp.
Bedside chargers.
Kitchen appliances.
Entertainment systems.
Do not overload electrical outlets.
If additional outlets are genuinely needed, have them installed professionally.
Step 48: Plan Your Home Office
If you work remotely, establish the office before moving day.
Think about:
Desk position.
Natural light.
Internet connection.
Power outlets.
Chair ergonomics.
Storage.
Noise.
Video-call background.
A well-planned workspace can make the transition to the new home much easier.
Step 49: Prepare a First-Night Box
One of the most useful moving strategies is preparing a box or bag containing everything you need immediately.
Include:
Toiletries.
Toilet paper.
Phone chargers.
Basic medications.
Clean clothes.
Towels.
Bedding.
Basic kitchen supplies.
Drinking water.
Snacks.
Cleaning supplies.
Important documents.
Do not put these items in a random moving box.
Keep them accessible.
Step 50: Keep Important Documents Separate
Your essential documents should travel with you rather than inside the moving truck.
These may include:
Identification.
Lease or purchase documents.
Insurance information.
Utility details.
Medical information.
Financial documents.
Moving contracts.
Important contact numbers.
Keeping these documents accessible reduces unnecessary stress.
Step 51: Create a Home Maintenance Folder
Start a dedicated digital or physical folder for the property.
Store:
Appliance manuals.
Warranty information.
Repair invoices.
Contractor details.
Paint colors.
HVAC information.
Water heater information.
Insurance documents.
Utility information.
This becomes a valuable reference as the years go by.
Step 52: Learn the Age of Major Systems
Find out the approximate age of:
Roof.
HVAC system.
Water heater.
Electrical system.
Major appliances.
Windows.
Plumbing components.
Knowing the age of these systems helps you anticipate future maintenance and replacement costs.
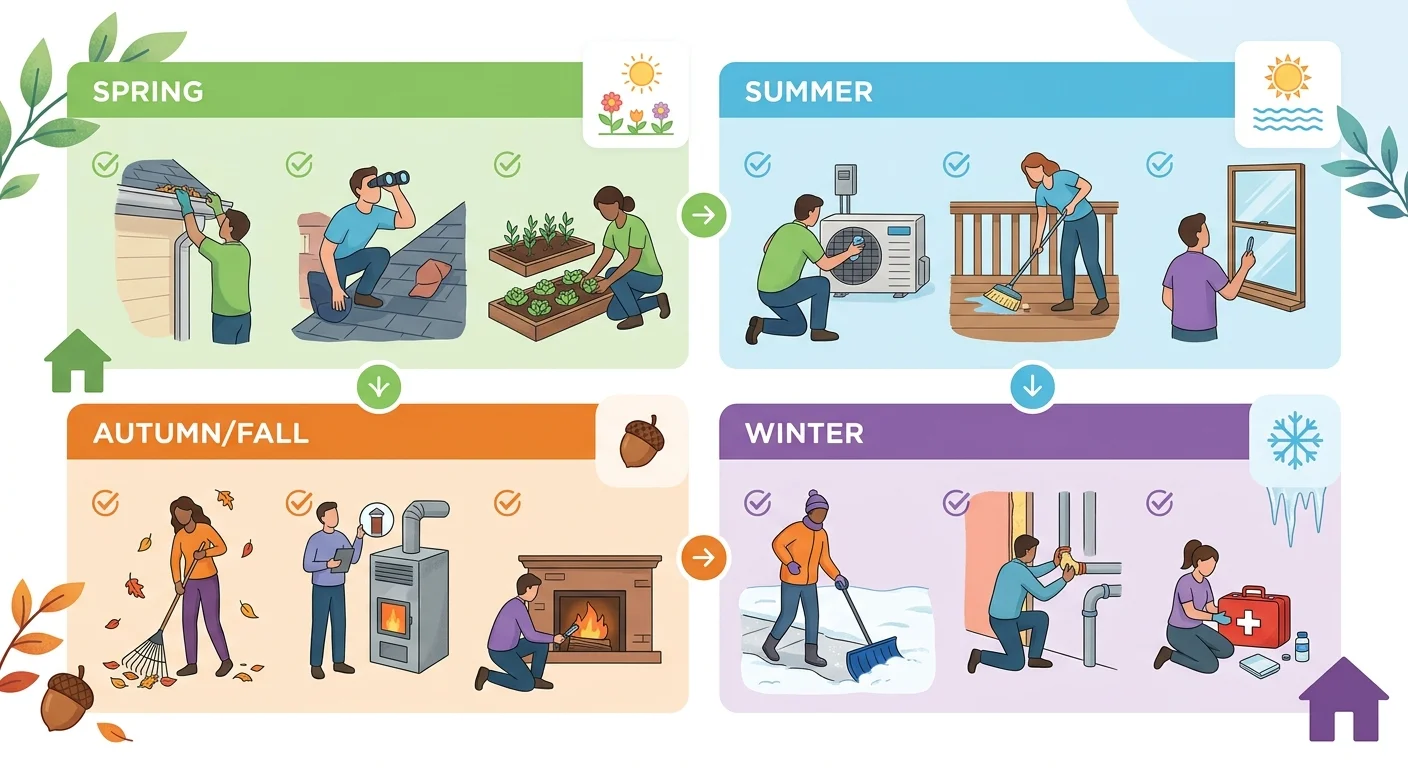
Step 53: Build a Maintenance Calendar
Do not wait until something breaks.
Create recurring reminders for:
HVAC filter replacement.
Smoke alarm testing.
Air-conditioning servicing.
Water heater inspection.
Gutter cleaning where applicable.
Roof inspection.
Pest inspection if needed.
Appliance maintenance.
The exact schedule depends on your home and local recommendations.
Step 54: Check for Pests
Inspect the home for signs of insects or rodents.
Look for:
Droppings.
Chewed materials.
Nests.
Holes.
Insects.
Damage around food-storage areas.
Pay particular attention to kitchens, basements, garages, and exterior entry points.
If there is evidence of a serious infestation, professional pest control may be appropriate.
read more about property inspection checklist
Step 55: Inspect the Attic, Basement, or Crawl Space
If the property has these areas, inspect them before storing belongings.
Look for:
Moisture.
Leaks.
Pest activity.
Poor insulation.
Exposed wiring.
Ventilation problems.
Structural concerns.
Do not enter unsafe spaces without appropriate precautions.
Step 56: Check the Garage
If there is a garage, inspect:
Garage door.
Remote.
Safety sensors.
Lighting.
Electrical outlets.
Floor.
Storage.
Door connecting to the home.
Keep emergency access and electrical panels clear.
Step 57: Review the Exterior
Walk around the property.
Inspect:
Roof edges.
Gutters.
Drainage.
Downspouts.
Walls.
Fences.
Driveway.
Walkways.
Outdoor faucets.
Trees.
Large branches.
Standing water.
Water should generally be directed away from the building rather than toward its foundation.
Step 58: Check Drainage After Rain if Possible
If weather conditions allow, observe how water moves around the property.
Look for areas where water collects near the house.
Poor drainage can contribute to:
Foundation moisture.
Basement leaks.
Soil erosion.
Landscape damage.
Persistent standing water.
Step 59: Plan Furniture Deliveries
Do not schedule every delivery for the same day unless you have a very good reason.
Large furniture deliveries can create congestion.
Prioritize essential pieces:
Bed.
Mattress.
Refrigerator if needed.
Basic seating.
Work desk if required.
Then schedule less urgent furniture afterward.
Step 60: Do Not Unpack Everything Immediately
Once the moving truck arrives, avoid opening every box at random.
Start with essential rooms.
A practical order is:
Bedroom.
Bathroom.
Kitchen essentials.
Home office.
Living area.
Storage.
Decorations.
This allows you to establish basic functionality quickly.
A Practical Pre-Move Timeline
A good home moving guide should not only tell you what to do, but also when to do it.
Several Weeks Before Moving
- Confirm move-in date.
- Arrange utilities.
- Schedule internet.
- Arrange insurance.
- Book movers.
- Measure furniture.
- Plan renovations.
- Order essential appliances.
- Schedule professional cleaning if needed.
- Arrange locksmith services if desired.
One Week Before Moving
- Confirm utility activation.
- Confirm internet appointment.
- Prepare cleaning supplies.
- Prepare first-night essentials.
- Review furniture plan.
- Confirm delivery times.
- Organize important documents.
One or Two Days Before Moving
If you already have access to the property:
- Deep-clean.
- Inspect plumbing.
- Test electricity.
- Check HVAC.
- Replace filters.
- Test alarms.
- Change locks if necessary.
- Clean appliances.
- Photograph the property.
- Check for leaks.
Moving Day
- Keep documents with you.
- Keep your phone charged.
- Keep first-night supplies accessible.
- Direct movers using your furniture plan.
- Protect floors where necessary.
- Check that essential utilities work.
- Verify large furniture placement before movers leave.
The Most Common New Home Preparation Mistakes
Moving Furniture in Before Cleaning
This makes cleaning significantly harder.
Forgetting Internet Installation
Technician appointments may not be available immediately.
Ignoring Small Leaks
Small leaks can become expensive problems.
Not Changing Locks
You may not know how many old keys exist.
Skipping Documentation
Without photographs, it can be harder to prove the condition of a rental property at move-in.
Buying Furniture Before Measuring
A beautiful sofa is useless if it cannot enter the house.
Overlooking Utility Shutoffs
You should know where they are before an emergency occurs.
Treating Security as an Afterthought
Locks, lighting, cameras, and access control should be considered early.
Printable New Home Checklist
Use the following list as a practical checklist you can print or save digitally.
Documentation
☐ Confirm move-in date
☐ Collect keys
☐ Collect access cards and remotes
☐ Review purchase or rental documents
☐ Photograph the property’s condition
☐ Record existing damage
☐ Save important documents
Utilities
☐ Electricity active
☐ Water active
☐ Gas active if applicable
☐ Waste collection arranged
☐ Internet scheduled
☐ Utility shutoffs located
Cleaning
☐ Floors cleaned
☐ Windows cleaned
☐ Cabinets cleaned
☐ Closets cleaned
☐ Kitchen deep-cleaned
☐ Refrigerator cleaned
☐ Oven cleaned
☐ Bathrooms disinfected
☐ Baseboards cleaned
☐ Storage areas cleaned
Plumbing
☐ Check faucets
☐ Check water pressure
☐ Inspect under sinks
☐ Flush toilets
☐ Check drains
☐ Inspect water heater
☐ Look for leaks
Electrical
☐ Test outlets
☐ Locate electrical panel
☐ Check switches
☐ Inspect damaged outlets
☐ Confirm major appliances have appropriate power
Heating and Cooling
☐ Test HVAC
☐ Check thermostat
☐ Replace filter if necessary
☐ Check vents
☐ Schedule maintenance if needed
Safety
☐ Test smoke alarms
☐ Test carbon monoxide alarms
☐ Check fire extinguishers
☐ Review emergency exits
☐ Locate utility shutoffs
Security
☐ Change or rekey locks
☐ Check doors
☐ Check windows
☐ Install exterior lighting if needed
☐ Review garage security
☐ Consider security cameras
☐ Secure Wi-Fi network
Insurance
☐ Activate home insurance
☐ Review coverage
☐ Check liability protection
☐ Document valuable belongings
☐ Save policy information
Furniture
☐ Measure doorways
☐ Measure hallways
☐ Measure rooms
☐ Create furniture layout
☐ Plan traffic flow
☐ Check outlet locations
☐ Schedule deliveries
First Night
☐ Bedding
☐ Towels
☐ Toiletries
☐ Toilet paper
☐ Phone chargers
☐ Basic medications
☐ Basic cleaning supplies
☐ Drinking water
☐ Easy food
☐ Important documents
read more about best neighborhood to live
Moving into a new home is much easier when preparation happens before the boxes arrive.
The empty property gives you a rare opportunity to clean every corner, inspect hidden areas, perform maintenance, test utilities, improve security, arrange internet service, and plan your furniture without working around a crowded house.
The most important principle is simple: complete the disruptive jobs before you move your belongings in.
Clean first.
Inspect first.
Repair first.
Secure first.
Plan first.
Then move in.
A detailed new home checklist does more than help you remember small tasks. It gives you a system for turning an empty property into a safe, functional, comfortable home.
The most useful checklist is not necessarily the one with the largest number of tasks. It is the one that helps you complete the right tasks in the right order.
Before the first box enters the house, make sure the utilities work, the plumbing is sound, the major systems have been checked, the property is clean, the home is secure, your insurance is active, your internet plans are ready, and your furniture can physically fit through the doors.
Once those fundamentals are handled, the move becomes much less stressful.
You can then focus on what makes the house feel like home: arranging your rooms, unpacking your belongings, organizing storage, decorating, and creating routines that fit your new space.
That is the real goal of good new house preparation: not simply getting through moving day, but starting life in the new home with fewer surprises, fewer avoidable expenses, and a much stronger sense that everything is under control.