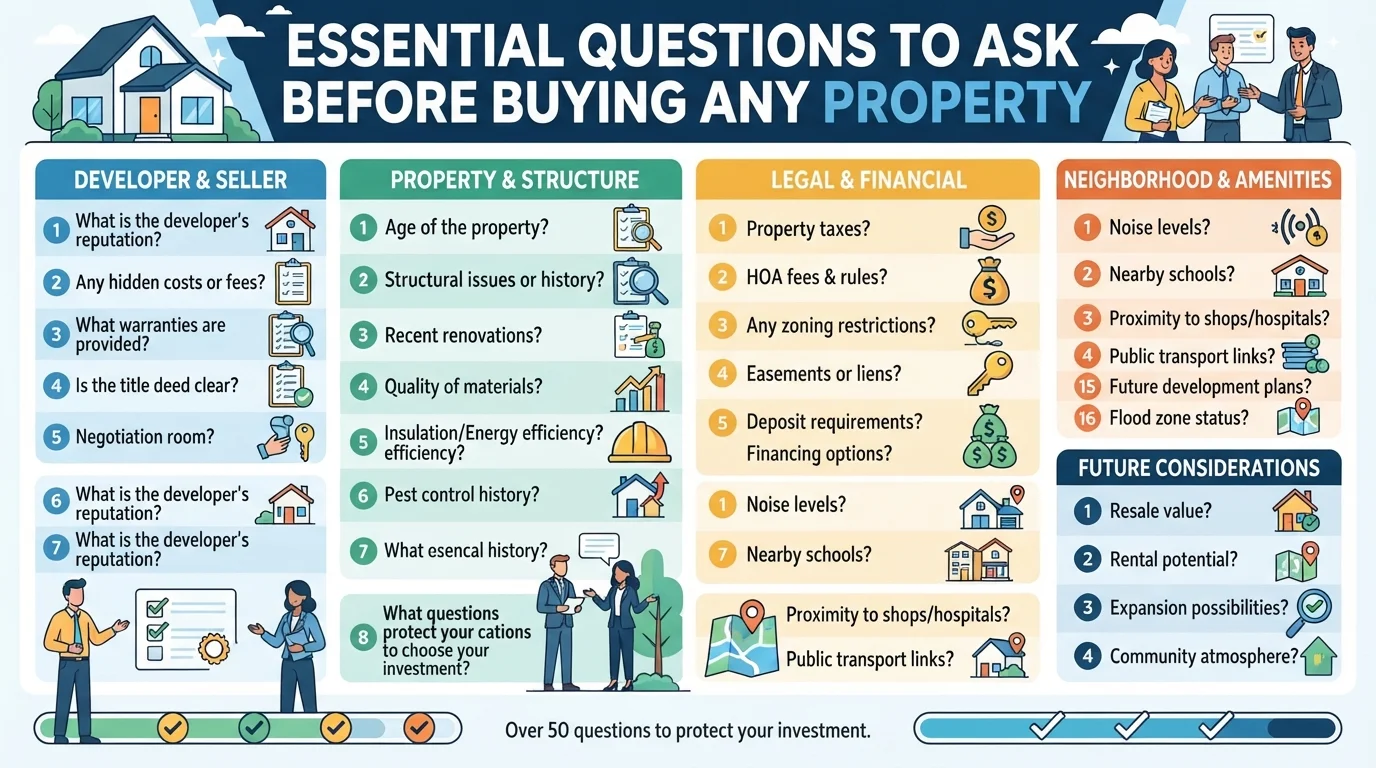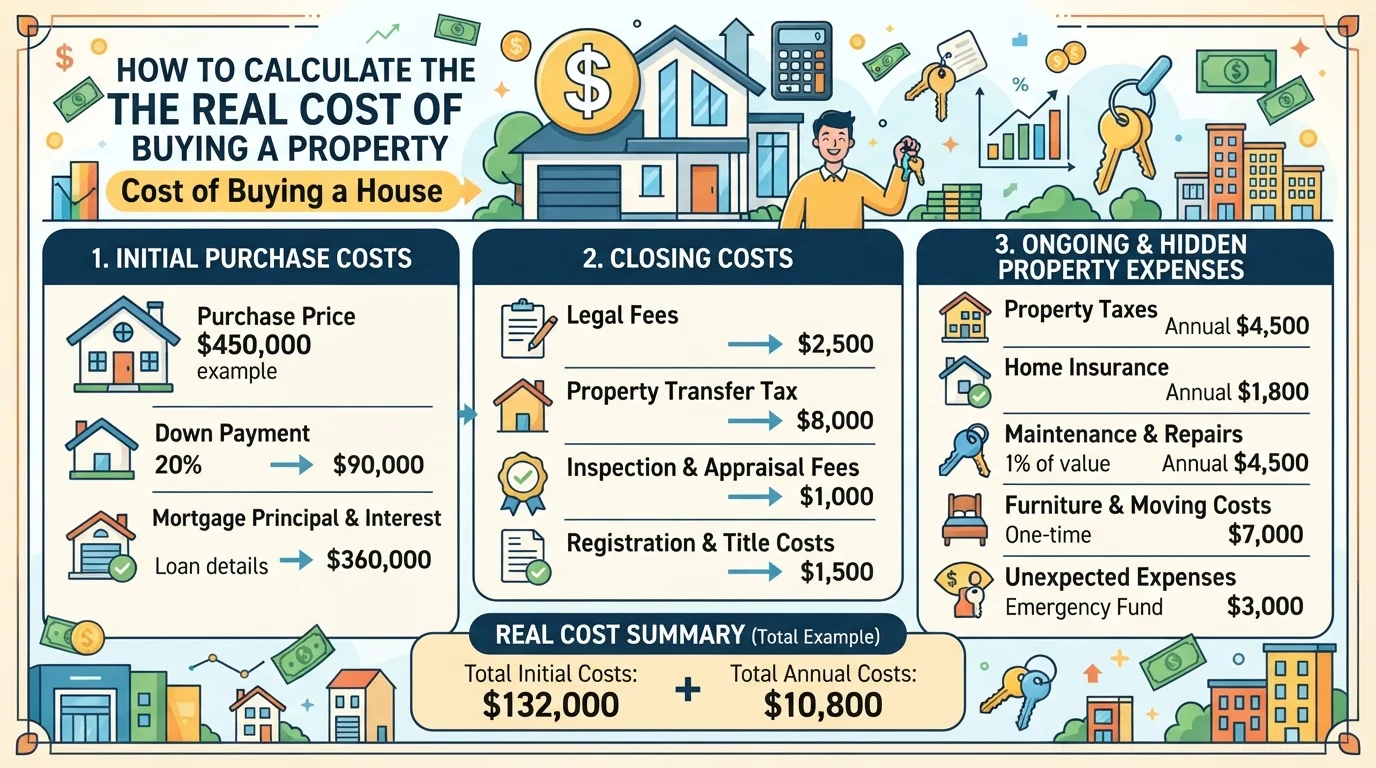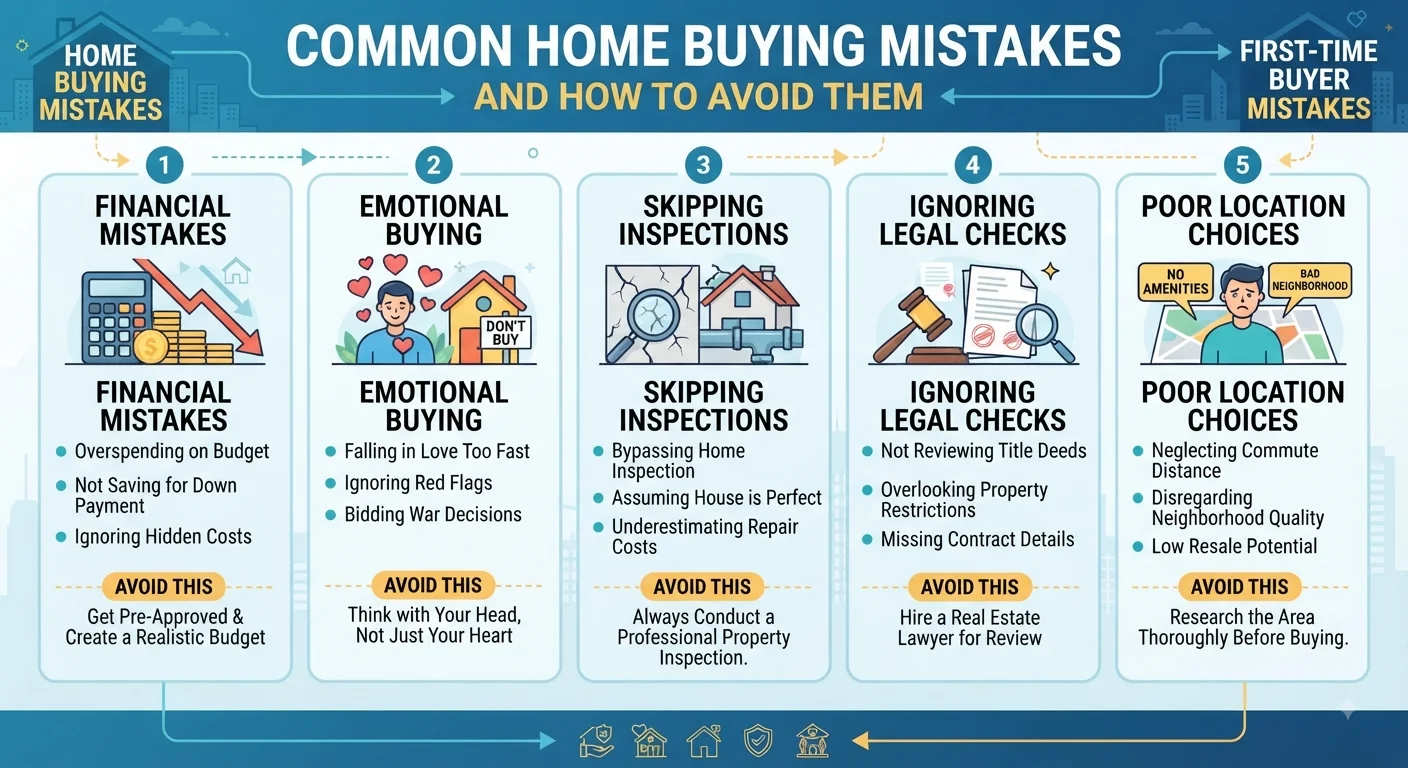
Buying a property is one of the biggest financial decisions most people make. Whether you are purchasing a family home, an apartment, a vacation property, or an investment unit, the excitement of finding the right place can sometimes make it easy to overlook important details.
A property may look perfect during a short viewing, but appearances do not always reveal hidden problems. Water leaks can remain behind walls, electrical systems may be outdated, roofing problems can be difficult to see from the ground, and flooring may conceal moisture or structural issues.
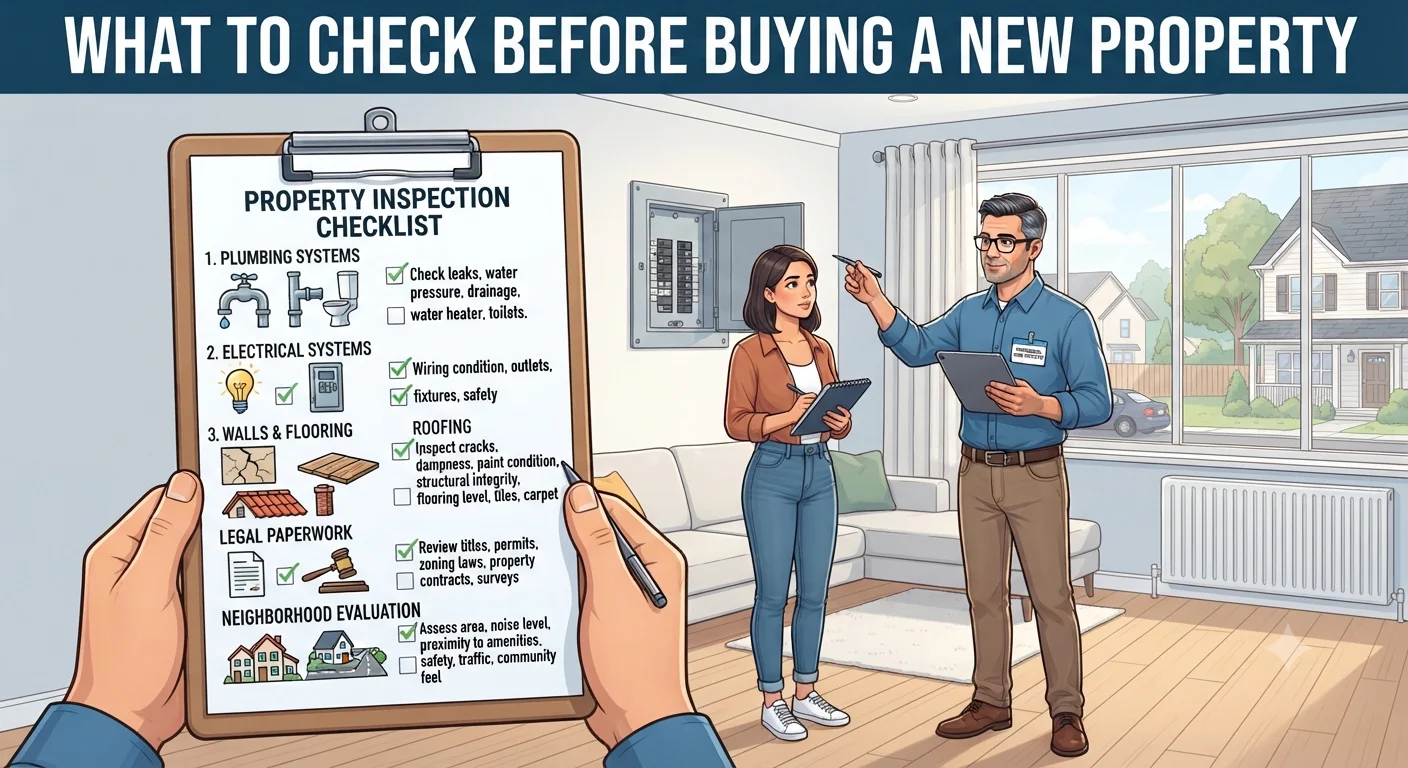
This is why a detailed property inspection checklist is essential before committing to a purchase.
A good inspection is not simply about finding defects. It is about understanding the property’s condition, identifying potential repair costs, assessing safety, and determining whether the asking price makes financial sense.
This guide provides a comprehensive home inspection checklist covering the major physical systems of a property, as well as paperwork, location, neighborhood conditions, and practical considerations that buyers should investigate before signing a purchase agreement.
read more about pet-friendly home
Why a Property Inspection Matters Before Buying
A beautiful property can still have hidden problems
A freshly painted house with attractive flooring and modern furniture can create an excellent first impression.
However, cosmetic improvements do not necessarily mean that the underlying property is in good condition.
A buyer should look beyond:
- Paint colors.
- Furniture.
- Decorative lighting.
- Kitchen finishes.
- Curtains.
- Landscaping.
- Staging.
Instead, pay attention to the systems that determine how the property actually performs.
A property can look attractive while having:
- Poor drainage.
- Plumbing leaks.
- Electrical hazards.
- Roof deterioration.
- Structural cracks.
- Dampness.
- Termite damage.
- Poor ventilation.
- Aging mechanical systems.
Identifying these problems before purchase gives you an opportunity to negotiate, budget for repairs, or reconsider the transaction.
Inspection protects your financial decision
The purpose of a property inspection is not to guarantee that a building will never develop a problem.
No inspection can predict every future repair.
Instead, an inspection helps you understand the condition of the property at the time of purchase.
This information can help you answer important questions:
- Is the asking price reasonable?
- Are major repairs needed?
- Which repairs are urgent?
- Which issues can wait?
- How much maintenance may be required?
- Is the property suitable for your intended use?
Property Inspection Checklist: Start With the Exterior
Inspect the surrounding land
Before entering the property, examine the land around the building.
Look for signs that water may collect near the foundation or walls.
Check whether:
- The ground slopes away from the building.
- Rainwater has a clear drainage path.
- Gutters discharge water away from the structure.
- There are visible areas of standing water.
- Soil is unusually wet.
- Exterior walls show moisture staining.
Poor drainage can contribute to moisture problems inside the building.
Examine exterior walls
Walk around the entire property rather than inspecting only the front entrance.
Look for:
- Large cracks.
- Horizontal cracks.
- Stair-step cracks in masonry.
- Bulging walls.
- Missing exterior materials.
- Damaged render or plaster.
- Peeling paint.
- Signs of water penetration.
- Gaps around windows and doors.
Not every crack indicates a structural problem.
Some cracks can result from normal settlement or changes in temperature and humidity.
However, large, growing, or unusual cracks deserve professional attention.
Check windows and frames
Windows influence ventilation, insulation, security, and moisture control.
Inspect:
- Glass condition.
- Window frames.
- Locks.
- Seals.
- Opening mechanisms.
- Visible condensation.
- Signs of water damage around frames.
Try opening and closing representative windows.
A window that sticks may indicate a damaged frame, movement in the structure, or simply a maintenance issue.
Examine exterior doors
Exterior doors should close securely and align properly.
Check:
- Hinges.
- Locks.
- Door frames.
- Weather seals.
- Gaps.
- Signs of swelling or moisture damage.
A door that is difficult to close may require adjustment, but it can also sometimes indicate movement or moisture-related problems.
Roofing Inspection Checklist
Why the roof deserves special attention
Roof repairs can be expensive, and some problems are not visible from inside the property.
The roof should therefore be an important part of any property inspection checklist.
If the roof cannot be safely accessed, inspect it from appropriate viewing points and consider hiring a qualified professional.
Check roof coverings
Depending on the property, the roof may use:
- Tiles.
- Metal sheets.
- Shingles.
- Membrane systems.
- Concrete.
- Other roofing materials.
Look for:
- Missing sections.
- Broken tiles.
- Cracked materials.
- Rust.
- Sagging areas.
- Loose components.
- Excessive wear.
- Improper repairs.
Inspect flashing
Flashing is used around vulnerable areas such as chimneys, roof intersections, vents, and other penetrations.
Damaged or poorly installed flashing can allow water to enter the structure.
Look for visible gaps, corrosion, lifting, or deterioration.
Check gutters and downspouts
Gutters should be free from obvious blockages and damage.
Check whether downspouts direct water away from the building.
A downspout that releases water directly beside the foundation can contribute to moisture problems.
Look inside the attic if accessible
If the property has an attic or roof space, inspect it for:
- Water stains.
- Damp insulation.
- Mold-like growth.
- Daylight visible through roof areas.
- Damaged structural components.
- Pest activity.
- Poor ventilation.
Fresh paint in a small area of the ceiling or roof structure may warrant additional questions if it appears to conceal an old leak.
read more about pet-friendly communities
Foundation and Structural Inspection
Look for significant cracks
Foundation problems can be among the most expensive issues a buyer encounters.
Look for cracks in:
- Foundation walls.
- Basement walls.
- Interior walls.
- Floors.
- Exterior masonry.
Pay particular attention to cracks that are wide, diagonal, horizontal, or accompanied by doors and windows that no longer operate correctly.
Check floors for unusual slopes
Walk slowly through each room.
Notice whether floors feel:
- Uneven.
- Sloped.
- Springy.
- Soft.
- Unusually flexible.
An uneven floor does not automatically mean a serious structural problem.
Older buildings may have some irregularities.
However, significant changes or unusual movement should be investigated.
Look for signs of movement
Check whether:
- Doors suddenly fail to close.
- Windows stick.
- Cracks appear above doors.
- Walls appear bowed.
- Floors slope noticeably.
When several of these signs appear together, professional structural assessment may be appropriate.
Interior Wall Inspection
Examine wall surfaces
Walls can reveal problems that are easy to miss during a quick viewing.
Look for:
- Cracks.
- Bubbling paint.
- Peeling wallpaper.
- Discoloration.
- Damp patches.
- Mold-like spots.
- Soft areas.
- Previous repair patches.
Water stains should never be ignored simply because the wall has been repainted.
Ask the seller or agent about the history of any visible repair.
Check corners and ceilings
Moisture may become particularly noticeable around:
- Ceiling corners.
- Bathroom walls.
- Kitchen walls.
- Window corners.
- Exterior-facing walls.
Inspect these areas carefully.
Look behind furniture when possible
Large furniture can hide wall damage.
During a serious inspection, do not limit yourself to what is immediately visible.
Where permitted, inspect areas behind wardrobes, cabinets, and other large items.
Flooring Inspection Checklist
Examine the surface
Different flooring materials require different checks.
For tile floors, look for:
- Cracked tiles.
- Loose tiles.
- Hollow-sounding sections.
- Broken grout.
- Uneven areas.
For wood flooring, check for:
- Warping.
- Cupping.
- Staining.
- Soft sections.
- Gaps.
- Scratches.
- Moisture damage.
For carpet, look for:
- Stains.
- Unusual odors.
- Dampness.
- Worn areas.
- Uneven sections.
Check transitions
Pay attention to areas where different flooring materials meet.
Poor transitions can create trip hazards and may indicate previous renovation work.
Do not judge flooring only by appearance
New flooring can sometimes hide an older problem.
For example, fresh flooring installed over a damp surface may deteriorate again.
If you notice unusual odors, warping, or localized damage, investigate the cause rather than focusing only on replacing the finish.
Plumbing Inspection Checklist
Locate the main water shutoff
Before buying a property, find out where the main water shutoff valve is located.
A buyer should know how the water supply can be turned off in an emergency.
Test faucets
Turn on faucets in different parts of the property.
Check:
- Water pressure.
- Flow rate.
- Temperature.
- Drainage.
- Leaks.
- Unusual noises.
Do not inspect only one faucet.
Testing multiple fixtures can help reveal whether a problem is localized or affects the entire plumbing system.
Test hot water
Turn on hot water from representative fixtures.
Observe:
- How quickly hot water arrives.
- Whether the temperature remains stable.
- Whether the water heater makes unusual sounds.
- Whether there are visible leaks.
Inspect under sinks
Open cabinets below sinks.
Look for:
- Water stains.
- Dampness.
- Corrosion.
- Drips.
- Damaged cabinetry.
- Mold-like growth.
- Improper pipe connections.
A cabinet can conceal a slow leak that is not obvious from outside.
Check toilets
Flush each toilet where practical.
Check whether:
- It flushes properly.
- Water continues running.
- The bowl refills normally.
- The base moves.
- There are visible leaks.
A toilet that rocks when gently tested may require attention.
Examine drains
Run water through sinks, showers, and tubs.
Slow drainage can indicate:
- Blockage.
- Pipe buildup.
- Poor venting.
- Drainage problems.
One slow drain may be a local issue, while multiple slow drains could suggest a larger plumbing problem.
Water Heater Inspection
Check the age and condition
Ask how old the water heater is and whether it has been serviced.
Look for:
- Corrosion.
- Leaks.
- Rust.
- Damaged connections.
- Unusual noises.
- Missing insulation where appropriate.
The expected service life varies by equipment type and maintenance history.
Check installation
The water heater should be installed appropriately and safely.
Ask whether the installation was performed by a qualified professional and whether required permits or inspections were obtained.
Electrical System Inspection
Locate the electrical panel
Find the main electrical panel and inspect its general condition.
Look for:
- Signs of overheating.
- Burn marks.
- Rust or moisture.
- Missing covers.
- Damaged components.
- Unusual modifications.
Do not remove electrical panel covers yourself unless you are qualified to do so.
Test outlets
Use an appropriate outlet tester where permitted and safe.
Check representative outlets throughout the property.
Pay particular attention to kitchens, bathrooms, garages, outdoor areas, and other locations where special electrical protection may be required by local regulations.
Look for overloaded extensions
Temporary extension cords should not be used as permanent wiring solutions.
An unusual number of extension cords may indicate insufficient outlets or an electrical system that does not meet the property’s current needs.
Check switches and lights
Operate representative light switches.
Look for:
- Flickering.
- Delayed operation.
- Sparks.
- Buzzing sounds.
- Loose switches.
- Nonfunctional fixtures.
Electrical abnormalities should be assessed by a qualified electrician.
Heating, Cooling, and Ventilation
Test the HVAC system
If the property has heating or cooling equipment, ask about its age and maintenance history.
Where appropriate, test the system.
Check for:
- Unusual noises.
- Weak airflow.
- Uneven temperatures.
- Unpleasant odors.
- Visible leaks.
- Excessive vibration.
Inspect air filters
Dirty filters may indicate poor maintenance.
A filter that has been neglected does not necessarily mean the entire system is damaged, but it can provide useful information about maintenance habits.
Check ventilation
Good ventilation helps control humidity and indoor air quality.
Inspect:
- Bathroom exhaust fans.
- Kitchen ventilation.
- Mechanical ventilation systems.
- Air vents.
Bathrooms without adequate ventilation may be more vulnerable to moisture buildup.
read more about preparing your home for a dog
Kitchen Inspection Checklist
Check cabinets
Open cabinet doors and drawers.
Look for:
- Water damage.
- Swelling.
- Loose hinges.
- Broken hardware.
- Signs of pests.
- Poor installation.
Inspect countertops
Check for:
- Cracks.
- Loose sections.
- Water damage.
- Poor seals around sinks.
Test appliances
If appliances are included in the sale, identify which ones will remain with the property.
Where possible, test:
- Oven.
- Stove.
- Refrigerator.
- Dishwasher.
- Range hood.
- Microwave.
- Garbage disposal where applicable.
Do not assume an appliance is included simply because it is visible during the viewing. Confirm it in writing.
Inspect around the sink
The kitchen sink area is especially important because it combines water supply, drainage, cabinetry, and electrical appliances.
Look for leaks and moisture damage.
Bathroom Inspection Checklist
Check walls and ceilings
Bathrooms naturally experience humidity, but excessive moisture can cause damage.
Look for:
- Mold-like growth.
- Peeling paint.
- Discolored ceilings.
- Soft wall sections.
- Damaged grout.
Inspect shower and tub areas
Check seals and grout.
Look for:
- Cracked tiles.
- Missing grout.
- Damaged silicone.
- Water stains.
- Loose fixtures.
Test ventilation
Turn on exhaust fans where installed.
A bathroom that remains excessively humid after use may have inadequate ventilation.
Basement and Lower-Level Areas
Look for moisture
Basements and lower-level rooms deserve special attention.
Check for:
- Damp smells.
- Water stains.
- Efflorescence.
- Mold-like growth.
- Cracks.
- Standing water.
- Damaged flooring.
Inspect sump pumps where applicable
If the property has a sump pump, ask whether it works and whether it has been maintained.
Find out whether the property has experienced previous flooding.
Attic and Insulation
Check insulation
Adequate insulation can influence comfort and energy efficiency.
Look for areas where insulation appears:
- Missing.
- Damaged.
- Wet.
- Compressed.
- Uneven.
The appropriate insulation standard depends on the local climate and building regulations.
Check ventilation
Roof spaces require appropriate ventilation to manage heat and moisture.
Poor attic ventilation can contribute to condensation and roofing problems.
Doors and Interior Hardware
Test interior doors
Open and close each door.
Check for:
- Sticking.
- Misalignment.
- Broken handles.
- Damaged hinges.
- Gaps.
A few minor door issues may simply be maintenance problems.
However, multiple misaligned doors throughout a building can sometimes indicate movement or settlement.
Windows and Natural Ventilation
Check every accessible window
Windows should be evaluated for:
- Operation.
- Locks.
- Cracks.
- Drafts.
- Condensation.
- Frame damage.
Good ventilation can improve indoor comfort and help control moisture.
Pest Inspection
Look for evidence of pests
Inspect the property for signs of:
- Termites.
- Rodents.
- Insects.
- Birds.
- Other unwanted animals.
Look for droppings, damaged materials, holes, nests, or unusual sounds.
Some pest problems are difficult to identify without professional inspection.
Termite damage
Wood-destroying insects can cause serious structural damage.
If the property is in an area where termites are common, consider obtaining a specialized pest inspection.
Safety Features
Smoke alarms
Check whether smoke alarms are installed where required.
Ask about their age and whether they are functional.
Carbon monoxide protection
Where applicable, check for carbon monoxide detectors.
Railings and stairs
Inspect:
- Stair treads.
- Handrails.
- Balustrades.
- Loose steps.
- Uneven surfaces.
Safety problems should not be dismissed as minor cosmetic defects.
Garage and Storage Areas
Inspect the garage
Check:
- Garage doors.
- Door openers.
- Flooring.
- Walls.
- Ceiling.
- Electrical outlets.
- Drainage.
- Signs of leaks.
Storage spaces
Storage areas can reveal hidden problems because they are often less frequently renovated.
Look for moisture, pests, poor ventilation, and structural damage.
Outdoor Areas
Inspect patios and balconies
Look for:
- Cracks.
- Loose tiles.
- Damaged railings.
- Poor drainage.
- Standing water.
Balconies should receive particular attention because structural or waterproofing problems can create serious safety risks.
Check fences and gates
Inspect:
- Stability.
- Rust.
- Rot.
- Damage.
- Gate operation.
Examine landscaping
Large trees close to the building may require professional evaluation, particularly if branches overhang the roof or roots may affect drainage or structures.
What Buyers Should Photograph During an Inspection
Document visible defects
With permission, photograph important issues.
Useful photos can include:
- Cracks.
- Water stains.
- Damaged flooring.
- Roof concerns.
- Plumbing leaks.
- Electrical panel conditions.
- Exterior damage.
Photographs make it easier to remember details after visiting multiple properties.
Keep notes with photographs
Record:
- Location.
- Description.
- Approximate severity.
- Questions to ask.
- Potential repair implications.
This turns a casual property viewing into a more organized evaluation.
How to Separate Cosmetic Problems From Serious Defects
Cosmetic issues
Examples may include:
- Wall color.
- Old curtains.
- Minor scratches.
- Outdated fixtures.
- Decorative finishes.
These may affect the property’s appearance but not necessarily its structural integrity.
Functional problems
Examples include:
- Leaking faucets.
- Broken appliances.
- Damaged doors.
- Poor drainage.
- Faulty fixtures.
These require repairs but may be relatively straightforward.
Major defects
More serious concerns may include:
- Significant structural movement.
- Major roof leaks.
- Extensive water damage.
- Unsafe electrical systems.
- Severe plumbing problems.
- Major foundation concerns.
These issues may have substantial financial consequences.
Why Buyers Should Not Rely Only on the Seller’s Inspection
An independent inspection provides another perspective
A seller may provide previous inspection reports or documentation.
These can be useful, but buyers should understand what the documents actually cover and when the inspection occurred.
An independent inspection gives the buyer an opportunity to evaluate the property based on their own interests.
Read previous reports carefully
If a previous inspection identified problems, determine:
- Whether they were repaired.
- Who performed the repairs.
- Whether permits were required.
- Whether documentation exists.
- Whether the repair was professionally completed.
Do not assume that a repaired item is automatically resolved.
read more about first-time home buyer
Hiring a Professional Home Inspector
When professional inspection is appropriate
A professional inspection is especially valuable for buyers who do not have technical expertise.
An inspector can evaluate major systems and identify issues that may not be obvious during a normal viewing.
Ask what the inspection includes
Before hiring an inspector, clarify whether the service covers:
- Structure.
- Roofing.
- Plumbing.
- Electrical.
- HVAC.
- Exterior.
- Interior.
- Insulation.
- Ventilation.
The exact scope varies by inspector and location.
Ask for a written report
A written report can help you understand the property’s condition and prioritize repairs.
Look for clear descriptions and photographs where appropriate.
Property Inspection Checklist Before Making an Offer
Before submitting or finalizing an offer, review the major categories:
Exterior
- Walls.
- Windows.
- Doors.
- Drainage.
- Landscaping.
- Exterior finishes.
Roof
- Coverings.
- Flashing.
- Gutters.
- Downspouts.
- Signs of leaks.
Structure
- Foundation.
- Cracks.
- Floors.
- Signs of movement.
Plumbing
- Water pressure.
- Faucets.
- Drains.
- Toilets.
- Water heater.
- Visible leaks.
Electrical
- Panel.
- Outlets.
- Switches.
- Lighting.
- Signs of overheating.
Interior
- Walls.
- Ceilings.
- Floors.
- Doors.
- Windows.
Kitchen
- Cabinets.
- Countertops.
- Sink.
- Appliances.
- Plumbing.
Bathrooms
- Fixtures.
- Drainage.
- Ventilation.
- Grout.
- Moisture.
Heating and cooling
- Equipment.
- Airflow.
- Filters.
- Maintenance records.
Safety
- Smoke alarms.
- Carbon monoxide detectors.
- Railings.
- Stairs.
This physical inspection is only one part of a complete property evaluation. In the next part, the checklist should go beyond the building itself and examine the property’s documents, ownership status, permits, utilities, neighborhood, surrounding infrastructure, costs, and other factors that can influence whether the purchase is actually a sound decision.
Use Inspection Results During Negotiation
Inspection findings can influence the offer
If significant defects are discovered, buyers may have several options depending on local laws and the purchase contract.
Potential approaches can include:
- Requesting repairs.
- Negotiating a lower price.
- Requesting a seller credit.
- Asking for specific items to be replaced.
- Reconsidering the transaction.
The best approach depends on the severity of the problem and the local legal framework.
Avoid focusing on minor defects
A long inspection report may contain dozens of observations.
Not all of them are negotiation points.
Normal maintenance items should be distinguished from significant defects.
Focus on issues that could materially affect:
- Safety.
- Structural integrity.
- Functionality.
- Major repair costs.
- Property value.
Conduct a final walkthrough
A final walkthrough should take place shortly before completion where appropriate.
The goal is to confirm that the property’s condition has not materially changed.
Check that:
- Agreed repairs were completed.
- Included appliances remain.
- No new damage has appeared.
- Utilities are functioning.
- Doors and windows remain operational.
- The property is in the agreed condition.
Verify agreed repairs
If the seller agreed to repair a roof, plumbing system, electrical problem, or other defect, request documentation when appropriate.
Do not assume that a repair was completed simply because the seller said it was.
A Practical Property Inspection Checklist
Before finalizing a purchase, review these categories.
Physical condition
- Roof.
- Foundation.
- Walls.
- Ceilings.
- Floors.
- Windows.
- Doors.
- Exterior surfaces.
Plumbing
- Water pressure.
- Faucets.
- Drains.
- Toilets.
- Water heater.
- Visible leaks.
- Sewer or septic system.
Electrical
- Main panel.
- Outlets.
- Switches.
- Lighting.
- Wiring concerns.
- Electrical capacity.
Mechanical systems
- Heating.
- Cooling.
- Ventilation.
- Water heating.
Safety
- Smoke alarms.
- Carbon monoxide detectors.
- Stairs.
- Railings.
- Fire safety.
Legal
- Ownership.
- Title.
- Liens.
- Taxes.
- Permits.
- Property boundaries.
- Renovation approvals.
Neighborhood
- Noise.
- Traffic.
- Parking.
- Safety.
- Schools.
- Healthcare.
- Shopping.
- Public transportation.
- Future development.
Financial
- Purchase price.
- Taxes.
- Insurance.
- Maintenance.
- Community fees.
- Utility costs.
- Expected repairs.
read more about apartment vs house
A successful property purchase requires more than finding a house that looks attractive.
The best home inspection checklist combines physical inspection with legal, financial, and neighborhood research.
Inspect the roof before assuming it is sound. Test plumbing rather than simply looking at fixtures. Examine electrical systems carefully. Look for moisture behind cosmetic improvements. Check floors, walls, ceilings, windows, doors, ventilation, and drainage.
Then go beyond the building.
Verify ownership documents, permits, boundaries, taxes, utilities, insurance considerations, and recurring costs. Visit the neighborhood at different times and investigate traffic, noise, parking, services, and future development.
Most importantly, do not allow excitement to replace due diligence.
A property can be visually impressive and still require substantial investment. Conversely, an older property with cosmetic imperfections may be structurally sound and financially attractive.
The purpose of a detailed property inspection checklist is to help you distinguish between these situations.
The more information you collect before committing to the purchase, the easier it becomes to make a decision based on facts rather than first impressions.